Most fireworks photography advice hands you a settings checklist and calls it a day. This piece starts somewhere more useful: the technique that makes those settings actually work, and the reason most people get it wrong before they ever touch a dial.
Long exposure is the backbone of every strong fireworks image. It’s also the technique most photographers misapply, either by treating it as one fixed setting or by ignoring the variables that shift minute to minute during a live show. Knowing how long exposure behaves in unpredictable light is what separates a sharp, layered frame from a washed-out streak. It’s the same skill that transfers directly into astrophotography, light trails, and architectural night work.
Here’s the full technique breakdown, from pre-show preparation to the editing decisions that salvage or elevate what you captured.
The Core Technique: Why Long Exposure Works for Fireworks
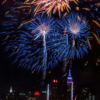
A firework is a moving light source against a dark field. A fast shutter freezes a single point in that movement. You get a dot, not a trail. A long exposure traces the full arc, recording the firework’s path as a continuous, glowing line across the frame.
Same principle behind star trails, car light streaks, and steel wool photography. The difference with fireworks is unpredictability. You can’t rehearse the timing, and the light intensity changes with every burst. A fixed setting rarely holds for an entire show.
The baseline: 3 to 8 seconds at f/8 to f/11, ISO 100 to 200. This range produces clean trails with enough depth of field to keep both the burst and any foreground elements sharp. But treating this as a locked setting is where most photographers start losing frames.
Before the Show: Preparation That Compounds
The ten minutes before the first burst determine the quality of the next thirty. Everything set up correctly here runs on autopilot during the show. Everything missed here becomes a problem you’re solving in the dark while frames are firing.
Location and Composition
Arrive early enough to scout sight lines. You need to know roughly where bursts will appear so you can pre-frame. Shooting from downwind means smoke drifts into your composition after the first few minutes. Upwind or crosswind positions stay cleaner longer.
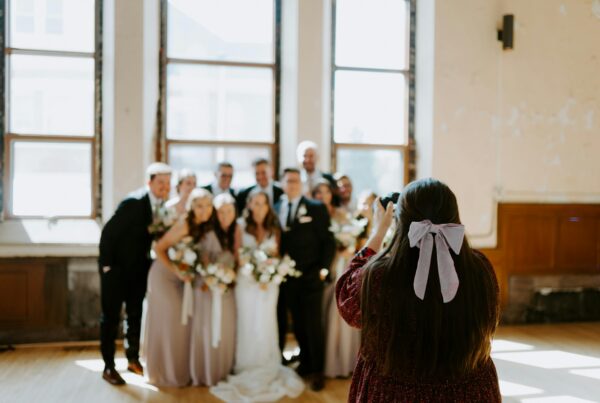
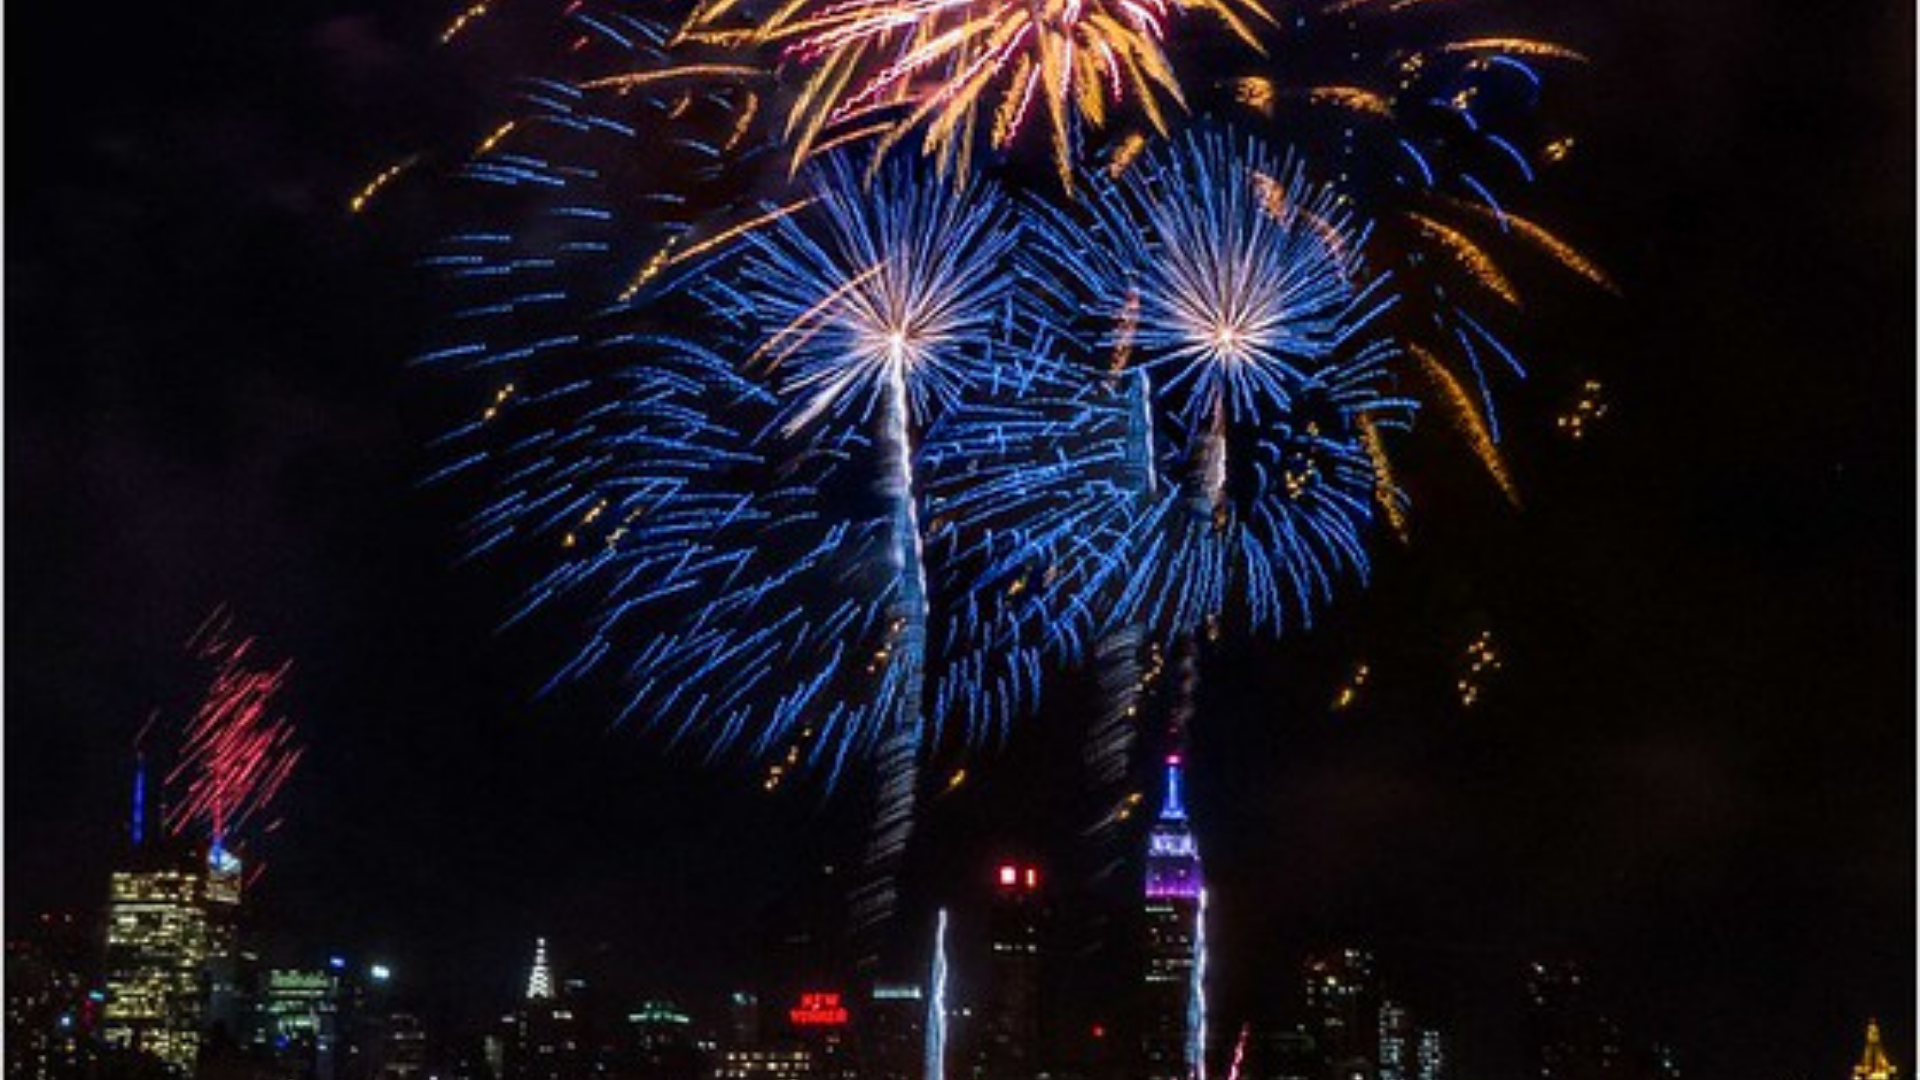
The strongest compositions include foreground context: a skyline, a body of water, a crowd silhouette, a landmark. A firework against a black sky is technically correct but visually generic. Frame that same burst above a bridge, reflected in a river, or arcing over a roofline, and you have an image with a sense of place.
Wide-angle lenses in the 16 to 35mm range capture the full burst arc plus foreground. A standard zoom (24 to 70mm) gives reframing flexibility without swapping glass mid-show. Telephoto (70 to 200mm) isolates individual bursts into abstract compositions. Striking results, but it demands precise timing and tighter framing.
For most situations, a 24 to 70mm or a wide prime in the 24 to 35mm range covers the broadest spread of compositions. Fast aperture is irrelevant here. You’re stopping down to f/8 or f/11 regardless, so an f/4 zoom performs identically to an f/1.4 prime for this kind of work.
Focus Lock
Autofocus fails in the dark. It hunts, racks back and forth, and misses the burst entirely. Before the show starts, switch to manual focus, set to infinity, then back off slightly. Many lenses overshoot true infinity at the hard stop.
Confirm with focus peaking if your camera supports it. If not, find a distant light source (a streetlight, a lit building, a star), zoom in on your LCD to 100%, and verify sharpness manually. Once confirmed, leave the focus ring alone for the rest of the night. Mid-show focus adjustments are one of the most common ways photographers lose otherwise correct exposures.
Stability
Long exposure amplifies every vibration. A tripod is the most reliable stabilization method, but any rigid surface works. A wall, a picnic table, a camera bag on a flat railing. The key is eliminating hand contact during the exposure itself. Use a 2 to 5 second self-timer, a remote shutter release, or your camera’s companion app.
If your tripod has a center column hook, hang your camera bag from it. The added weight dampens wind-induced vibration. Small detail. Matters more than most shooters expect.
During the Show: Reading the Light in Real Time
This is where the technique separates from the checklist. A fireworks show is not a static lighting environment. Burst frequency, color intensity, ambient smoke, and background light all shift throughout the display. Photographers who dial in one setting and hold it for twenty minutes walk away with a memory card of diminishing returns.
Adjusting Exposure Live
Start at the baseline: ISO 100, f/8, 4-second shutter speed. After the first two or three bursts, check your LCD.
Overexposed (bright white cores, lost color). Shorten the exposure to 2 or 3 seconds, or stop down to f/11. During rapid-fire sequences, especially finales, drop to 1 or 2 seconds to prevent a washed-out blur of overlapping light.
Underexposed (dim trails, lost foreground). Stretch to 6 seconds, or bump ISO to 200. In dark rural settings with no ambient light competition, exposures of 8 to 10 seconds produce dramatic, sweeping trails.
Cities and venues with ambient light. Shorter exposures prevent the sky from blowing out. Urban shoots often land in the 2 to 4 second range rather than the 6 to 8 seconds that work in darker environments.
The adjustment rhythm matters as much as the initial setting. Check every three or four frames. The show’s pacing changes. The opening salvos are usually spaced, the middle act builds, and the finale compresses. Your settings should track that arc.
Deliberate Underexposure
Bright fireworks clip highlights fast, collapsing vivid color into flat white blobs. Dialing in about –1 EV of exposure compensation, or simply shortening the shutter speed by a stop, preserves color and detail in the brightest parts of the burst. Shadows are recoverable in editing. Clipped highlights are not.
Check your histogram periodically. If the right edge is slamming against the wall, you’re losing data that no amount of post-processing can bring back.
RAW Files: The Non-Negotiable
JPEG compression throws away the tonal range fireworks demand. You lose subtle color gradations in the burst, shadow detail in the foreground, and the white balance flexibility that lets you correct for mixed lighting (sodium streetlamps, LED venue lights, the fireworks themselves) after the fact.
RAW files preserve all of this. An overexposed burst that looks ruined on the LCD can often be pulled back in Lightroom or Capture One. A dark foreground silhouette can be lifted into visibility without the noise and banding that JPEG recovery introduces.
If you’re newer to RAW editing, start with exposure and white balance adjustments. Even small corrections can transform a flat frame into a usable one. The learning curve is shallow, and the payoff is immediate.
Advanced Technique: Compositing Multiple Exposures
The most striking fireworks images often combine frames. One exposure optimized for the burst, another for the foreground scene. This lets you expose each element correctly without compromise.
The simplest approach is layer blending in Photoshop. Stack two frames taken from the same tripod position, mask the sky from one and the foreground from the other. More advanced compositors use luminosity masks to blend only the brightest elements (the fireworks themselves) onto a separately exposed base frame.
This technique also solves the smoke problem. Early-show frames have clean skies. Late-show frames have the best bursts. Compositing lets you combine the best sky with the best light.
Water Reflections: The High-Value Composition
If you have access to a waterfront vantage point, take it. Every time.
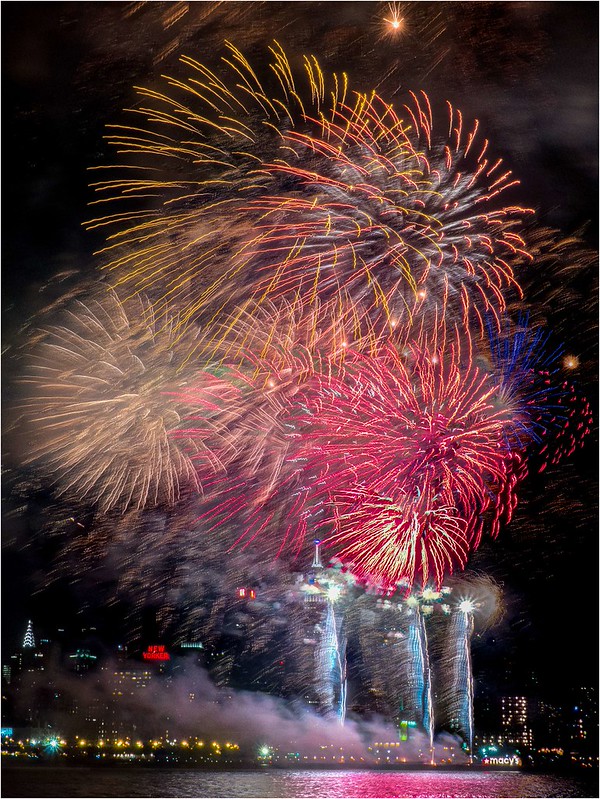
A 5 to 7 second exposure over a lake, river, or harbor captures both the burst and its reflection in the same frame. You’re effectively doubling the visual impact of the shot without touching an editing tool. The reflection also adds depth and grounding to a frame that would otherwise be pure sky.
One technical note worth remembering: water reflections extend the bright area of the frame, which can push your exposure toward overblown. Compensate by shortening exposure about one second compared to a non-water composition, or stopping down an additional half-stop.
After the Finale: The Frames Most People Miss
Almost everyone packs up after the last burst. That’s a mistake.
The minutes immediately following the finale produce some of the most atmospheric frames of the night. Residual smoke catches ambient light from streetlamps, venue lighting, the glow of a departing crowd. It creates a diffused, moody sky that’s impossible to replicate artificially.
Keep shooting for five to ten minutes after the finale. The dispersing crowd itself becomes subject matter. Silhouettes moving through haze. Flashlights cutting through smoke. The contrast between the spectacle that just ended and the quiet that follows.
These frames won’t look like traditional fireworks photography. That’s exactly why they stand out.
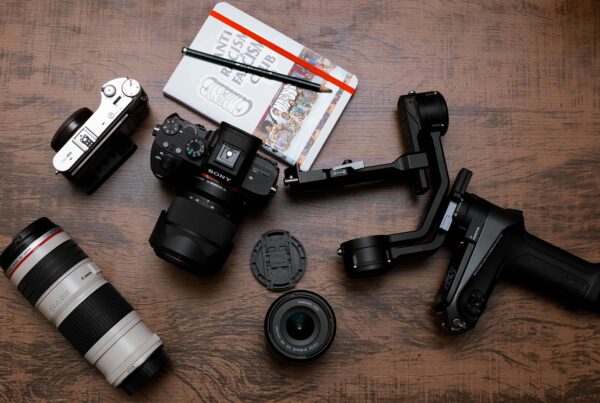
The Gear That Actually Matters
Fireworks photography is one of the most forgiving genres when it comes to gear requirements. The technique does the heavy lifting. But a few features make a measurable difference.
Manual controls are non-negotiable. Any camera that lets you set shutter speed, aperture, and ISO independently will work. Most interchangeable-lens cameras, DSLR or mirrorless, meet this bar.
RAW capability matters more than resolution or sensor size. A 16-megapixel APS-C sensor shooting RAW produces more editable results than a 45-megapixel full-frame sensor shooting JPEG. Every time.
Low-light noise performance becomes relevant at longer exposures (8+ seconds) or when pushing ISO above 200. Full-frame sensors have an advantage here, but it’s smaller than marketing departments suggest. Modern APS-C and Micro Four Thirds sensors handle this range cleanly.
Live Composite mode, available on Olympus and OM System bodies, is the single most useful specialty feature for this type of shooting. It layers only new light into an ongoing exposure, preventing the overexposure that plagues long-exposure fireworks shots. If you’re buying a camera specifically for night and long-exposure work, this feature alone justifies looking at the OM-D line.
You don’t need a new body for this. A well-maintained used camera performs identically to retail for long exposure work. Since this is a technique most photographers use a handful of nights per year, buying secondhand is the rational move.
What This Technique Unlocks Beyond Fireworks
Long exposure is a foundational skill, not a seasonal trick. The same principles (manual control, stable platform, exposure adjustment in changing light) transfer directly into other genres.
Astrophotography. Star trails and Milky Way captures rely on identical stabilization and manual focus discipline.
Light trail photography. Vehicle headlights and taillights on a highway or city overpass.
Architectural night photography. Buildings, bridges, and cityscapes after dark.
Steel wool and light painting. Controlled light sources swung or drawn during a long exposure.
Waterfall and moving water. Daytime long exposure with ND filters for silky water effects.
Fireworks are one of the most accessible entry points into long exposure because the subject does the work. You don’t need to find or create the light source. But the camera discipline you build here transfers to every other low-light and motion-based genre you’ll ever shoot.
Quick Reference: Settings by Scenario
| Scenario | Shutter Speed | Aperture | ISO | Notes |
|---|---|---|---|---|
| Standard burst | 3–5 sec | f/8 | 100 | Baseline starting point |
| Rapid-fire finale | 1–2 sec | f/8–f/11 | 100 | Prevents overlapping blur |
| Dark rural sky | 8–10 sec | f/8 | 100–200 | Longer trails, dramatic arcs |
| Urban / ambient light | 2–4 sec | f/11 | 100 | Prevents sky overexposure |
| Water reflection | 4–6 sec | f/11 | 100 | Shorter to compensate for doubled brightness |
| Post-finale atmosphere | 6–10 sec | f/5.6–f/8 | 200–400 | Open up for dimmer residual light |
FAQ
Why do my fireworks photos look overexposed even at low ISO? Exposure length is usually the problem, not ISO. Fireworks are intense point-light sources. A 6-second exposure during a rapid-fire sequence stacks multiple bursts into the same frame, blowing out the center. Shorten your shutter speed to 1 to 3 seconds during dense sequences, and underexpose by about one stop to preserve color in the highlights.
Does sensor size matter for fireworks photography? Less than you’d expect. Manual controls, RAW capability, and a stable platform matter far more. APS-C and Micro Four Thirds bodies handle this genre well. The Fujifilm X-T5 and Olympus OM-D series are strong performers. Full-frame offers a marginal noise advantage at very long exposures, but it’s rarely the deciding factor.
What’s the advantage of Live Composite mode? Standard long exposure accumulates all light hitting the sensor for the entire duration, including ambient light, which eventually overexposes the frame. Live Composite freezes the base exposure and layers only new, brighter light on top. You can leave the shutter open for 30+ seconds and capture multiple bursts without blowing out the sky. It’s the closest thing to a purpose-built fireworks mode that exists in a camera body.
Can I use this technique with a kit lens? Absolutely. Most kit lenses cover the 18 to 55mm range (roughly 27 to 82mm equivalent on APS-C), which is wide enough for full-burst compositions and tight enough for selective framing. Since you’re shooting at f/8 to f/11, the optical quality difference between a kit lens and a premium zoom is minimal. The real limitation isn’t optical. It’s that kit lens focus rings tend to be imprecise, which makes nailing manual focus slightly harder.
How do I prevent lens fog from fireworks smoke? Smoke accumulates fast, especially downwind. Keep a microfiber lens cloth accessible, not buried in a bag. Check your front element every few minutes. If you’re shooting in humidity, anti-fog wipes (the kind sold for eyeglasses and dive masks) applied before the show can reduce condensation buildup. But the most effective prevention is the simplest: position yourself upwind of the launch site.